Auro’s guide how not to get owned by bosses
Information about the author
Well, my in
game name is Auro. I’m a clan DA member and a hardcore gamer. I am the type that
always seeks bosses or other difficult to kill things. I guess that is why I
wrote this guide :). And uhh…. I hate writing about myself. Just read on.
Read this before scrolling down!!!!!
Checklist to
do:
Add
the unknown guardians
If you have any
suggestions on how to improve this guide, tell me.
I mostly
use/used my Temple Guardian build to check these bosses and mini bosses out. The
ratings I give are based upon my findings, but a different character and build
may struggle where I had a cakewalk. Remember this when reading the ratings!
Tips for
battling bosses (most of these you probably already know, but still):
Know what you are up against, especially resists. It really does not help
if you use a fire weapon against a fire boss. Likewise, if you see a boss that
deals a lot of poison damage, equip poison relics.
Stock up on potions. I hear you thinking ‘Duh!’ but really, at least
check your potions. They are are bosses we’re talking about. Nasty big drooling
snot-nosed oversized hard hitting lumps of EXP. They have their tricks and if
something goes awry you want to be able to chuck down potions. Also, take
experience potions with you and activate them when the boss is nearly dead.
If something wrong happens and you cannot find out what, F12!! Better run
like a coward then die like a hero.
I try to rate
bosses according to their difficulty. Rating is based on health, skills, types
of resists and overall damage. I use a Dutch system, meaning numbers from 1 to
10, 10 being the highest.
Note: All stats
thus far (as of 12/26/08) were taken in the Silver difficulty level and were
most likely taken at the level cap for that difficulty.
Mini
Bosses
Overall said,
mini bosses come close to normal bosses in terms of power. Some are very easy as
you shall see, but some can match the power of a main boss. A distinctive
character of mini bosses is that none of them have noteworthy hitpoints.
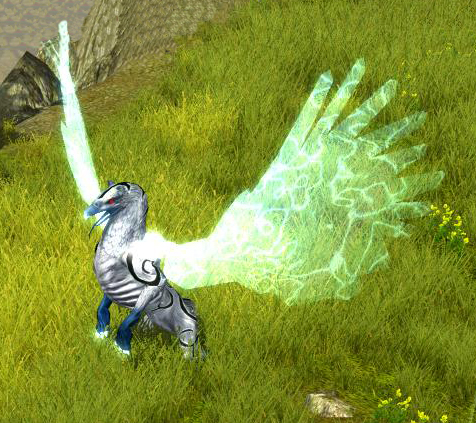
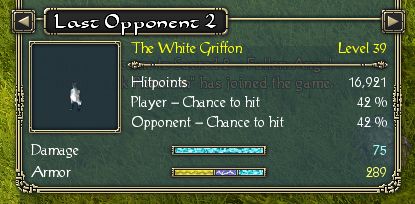
The White Griffon:
Preferred
resist to use: fire or poison.
Preferred
resist to protect yourself from: ice and magic.
Interesting, if
only for his looks. I really like how he looks :). Anyway, he is not much of a
treat. He has a ranged attack, a lightning bolt which hits for a fair bit and
can debuff. This debuff can be annoying if you rely on it to hit him or do some
good damage. Otherwise, he’s not much of a treat.
Picture:
Location:
Head towards
the Temple of Noriath. Close to it is a resurrection stone. Head west when
standing next to it.
See Boss Map for Location on
World Map
Rating: 6.5.
He’s not that tough, but his debuff can catch you off guard and make things
harder.
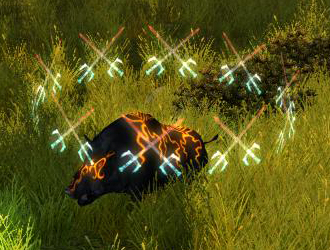
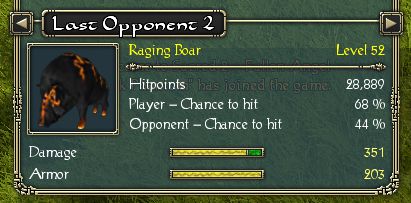
Raging Boar
Preferred
resist to use: pick any.
Preferred
resist to protect yourself from: melee
Well, a boar on
steroids would be the best way to describe him. He reminded me of the one ring
for some reason… anyway. He’s no serious threat, just a bit of a surprise since
he has a wide range of area he can be in. He fights like a boar champion, with
only an increased chance of stunning and that attack buff from the skeleton
centurions.
Picture:
Location:
Black wood
forest. Either use the portal in the cave to the human lands and head up to the
forest or take the portal to Kufferath Castle and head south. He’s bound to find
you.
See Boss Map for Location on
World Map
Rating: 5. Not
hard to hit, no real resists and his damage is not that hard.
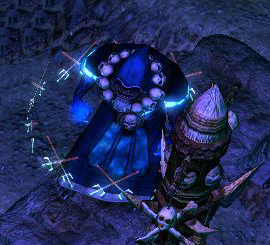
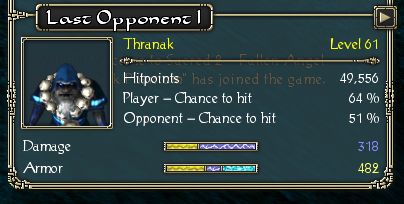
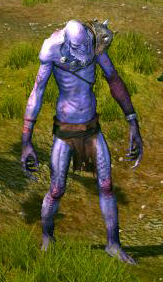
Thranak
Preferred
resist to use: pick any.
Preferred
resist to protect yourself from: ice and magic, in that order.
Thranak is a
t-mutated ogre shaman found deep in a cave. This guy is for a mini boss quite
nasty, as he has a mean trick up his sleeve. I saw him using two skills, an area
of effect attack of which I don’t know if it works and what it does. His second
skill is summoning t-mutant bears and boars rather quickly. This is what makes
him dangerous. My advice is to try to kill his summons as fast as possible, with
those he can be very dangerous. Even without those summons, I found myself
chucking down potions quite fast, so be prepared.
Picture:
Location:
Cave in
Schlun’Zum. I assume many people don’t know where it is :). Head out of the
Entruag portal to the west, keep following the road. Keep an eye for any
signposts. As soon as you find it, take a left turn and follow the dirt path
until you reach a road heading into the mountains. Follow that road, you’ll
reach a cave. Enter the cave and keep going. You have to enter and cross 3 caves
until you reach the bottom of the valley and a very large cave opening. That is
the right cave. Inside, keep following the path and keep your eye to the right.
You’ll find him eventually.
See Boss Map for Location on
World Map
Rating: 7. He
is nasty and strong and his summoning spells do not make it any easier. Still,
he is a mini boss so he lacks in the hitpoint area compared to main bosses.
Kobold Chieftain Gahanka
Preferred
resist to use: pick any, but be careful with fire. Not that it matters :).
Preferred
resist to protect yourself from: Meh, just wear some decent armor.
Well well well,
looks like our favorite bug ridden Kobold Chief is promoted. He actually has a
boss health bar now! Wow. Unfortunately, if you think that he became boss
strong, look somewhere else. He’s a troll with more hitpoints. Avoid his rock
throwing and laugh at him.
Picture:
Location:
Kobold village.
Just activate the Kobold Chief quest in Sloeford, you’ll reach it soon.
See Boss Map for Location on
World Map
Rating: 4.5.
Darn easy. I just heard from a different person that the Chief regenerates well
if you have bad damage per second. As my character can damage quite well, that
was not a problem for me. If he truly can regenerate when you cannot damage him
enough, I would rate him 6 as that can be a problem. Redid him, same result.
I’ve seen cases where players couldn’t hurt him beyond his hitpoint
regeneration, but I always kill him within a minute. I’d say this is a bug,
though the how and whys are unknown to me.
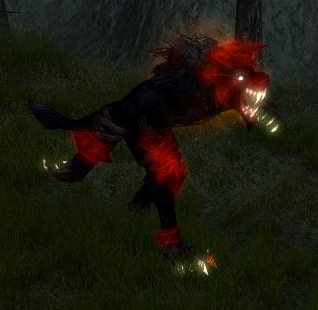
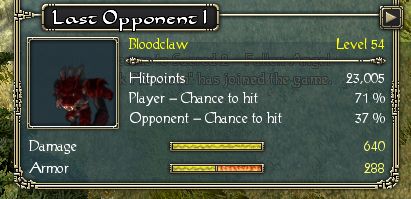
Bloodclaw
Preferred
resists to use: no fire, doesn’t matter beyond that.
Preferred
resists to protect yourself from: melee.
Ok, I wonder
what Ascaron was thinking naming this guy a mini boss. The only thing that would
qualify him as such is his low hitpoints, even though for a mini boss it is
quite a bit. This guy has no ranged attacks, but his melee makes up for it. He
attacks very fast, very hard and mixes his normal attacks with extra strong
attacks. At the same attack speed of course. I found myself constantly hitting
the spacebar and had at least 3 flashes in the overall fight. Be careful. He
looks awesome though :).
Picture:
Location:
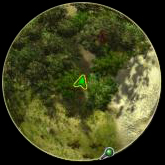
This is hard to
explain. He is in the back of the werewolves land (east of Griffinborough). Once
you reach the small forest through which it seems you cannot cross, there is a
small path you need to take to reach Bloodclaw. It is hard to spot so check the
mini-map screenshot below. If you find my last will there, please burn it.
See Boss Map for Location on
World Map
Rating: 7.5. I
would have given higher, but his hitpoints make up for it and he cannot fight
against ranged fighters that stay clear of his melee hits. But be warned, as he
is lethal to melee fighters.
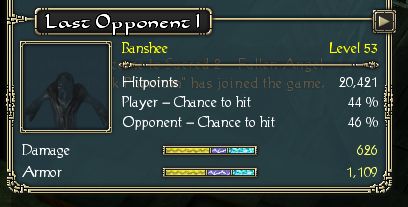
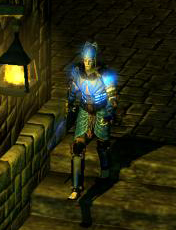
Banshee
Preferred
resists to use: fire or poison.
Preferred
resist to protect yourself from: find a mix between magic and ice. This girl
uses them both.
So, when I said
Bloodclaw was hard, I meant hard. Banshee is a different dimension of hard. Let
me list her attacks first. Her normal melee attack is pretty fast and it drains
hitpoints like life leech. Her ice bolt skill is very long range, I was hit by
her when I didn’t even have her hitpoints bar yet. And her lightning attack
might be her weakest skill, except that it stuns. Now for her power. She is
strong! Very strong, taking into mind that she is a mini boss. Her hits are even
harder than Bloodclaw, but with the same speed. Add to that her annoying stun,
her life leech AND her high hitpoints (serious, I think about the same hitpoints
as Colossus, definitely higher than any of the other mini bosses), you have
yourself possibly the strongest mini boss. Banshee rivals main bosses.
Picture:

Location:
Hard to
explain. Head out east from Artamark's Gate and keep following the main road.
When you reach a bridge, cross the river and keep following that road. On the t
split, head right. Just follow that direction until you reach an old house. The
cave is a little behind there.
See Boss Map for Location on
World Map
Rating: 9. She
rivals main bosses. Main problems are her strong ranged and melee attacks, high
hitpoints and life leech. If you do not trust your build or have doubts about
your equips, do not visit her.
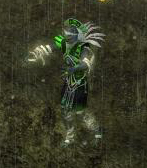
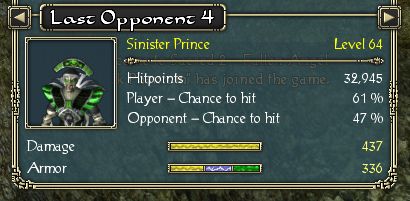
Sinister Prince
Preferred
resist to use: anything but poison and magic. Fire is recommended.
Preferred
resist to protect yourself from: poison.
I was hoping
for a boss bat in the swamps. Seriously. Princey is an undead zombie and a
rather interesting one. For melee fighters he is not much of a treat, but magic
users might struggle with him. His normal attack is rather dull, not fast or
strong. He has a ranged bolt that deals poison damage. His three remaining
skills are what makes him interesting. He can summon 3 or 4 skeletons, he can
expulse magic and he needs to be killed multiple times. I needed 3 times to
finally kill him, he revives. I do not know what effect his expulse magic spell
has on magic users, but I think he uses it to weaken magic spells directed at
him.
Picture:
Location:
In the swamps.
Take the portal of Hissil’Ta, then follow the road to Sar’Thaz. Then head
north. Once you reach a mountain range, head west. The map explains it better.
See Boss Map for Location on
World Map
Rating: 6.5-7.
Depending on his expulse magic, the rating can vary a bit. He is overall not bad
if you know what you are doing, but he doesn’t die easily and can summon.
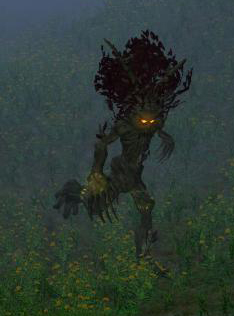
Forest Guardian
Preferred
resist to use: fire.
Preferred
resist to protect yourself from: poison.
One day, I was
strolling through the forest… admiring the views… laughing at all the plants…
and then I encountered this thing. And I thought, what is better than to loosen
those muscles by killing a boss! The next half hour I was humiliated, slandered,
rooted and frustrated by a running tree. You can imagine my mood. This thing is
annoying. It has good damaging attacks, runs pretty fast, can root you AND HAS A
GODFORSAKEN DAMNED HEAL THAT HEALS HIM FOR 60-70% EVERY TIME HE USES IT!!! It is
like wrestling with a bulldozer. There is no easy way to defeat him, you have to
out-damage his heal. Or just get some people to help you.
Picture:
Location:
Take the portal
to Aerendyr. Then head out west. You will run into him soon enough then.
See Boss Map for Location on
World Map
Rating: 8. He
only gets this rating for his heal ability. In terms of power he is a decent
hard-hitter.
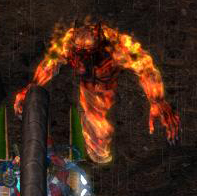
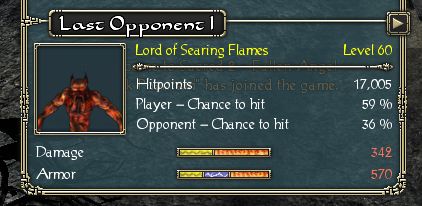
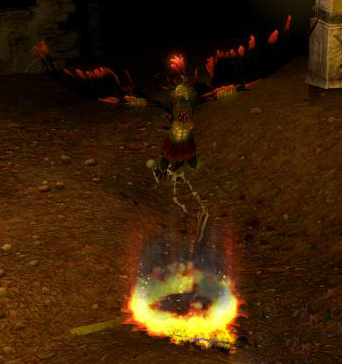
Lord of Searing Flames
Preferred
element to use: poison or ice, my preference is poison.
Preferred
element to protect yourself from: fire. Surprising eh?
I would
appreciate it if you would abstain from any barbeque or other burny comments.
This fiery opponent really lights my fires when fighting. It burns my heart just
to beat his smoking rear to the ground, but such is the torch lit on destiny. :D
Ok, no more lame jokes. Lord of Searing Flames is a big fire element who uses
about every spell of a fire High Elf. Incendiary Shower, Blazing Tempest and
Incendiary Shield. His attacks are not that bad, but for some reason I was doing
really bad damage against him, making all his attacks problematic. I did not
discover why I did so little damage, have to recheck him one day. Fortunately,
you find him next to a dragon statue, you can defend yourself from his Shower
attack when you stand under a wing.
Picture:
Location:
Really hard to
explain. Enter the Seraphim tunnels. You want the third island, with the
volcano. When on the island, head for the smith icon, you'll reach a little
village. Against the black wall-like mountain is a path that leads up. Follow
that path, the boss is at the end behind the statue.
See Boss Map for Location on
World Map
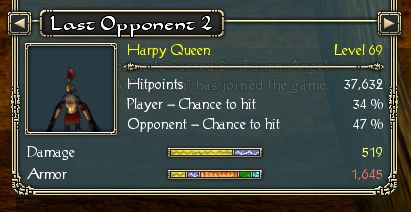
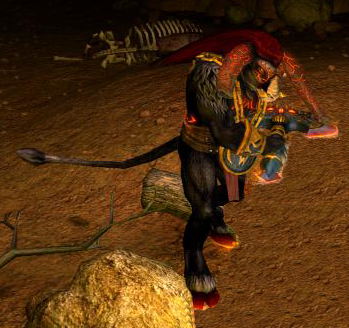
Harpy Queen
Preferred
resist to use: fire.
Preferred
resist to protect yourself from: ice.
Harpy Queen is
one of the two mini bosses found in the desert. Harpy adds a fresh new
experience to the mini bosses. She is a decent hitter, but that is not what
makes her annoying. She uses a debuffing lightning strike and Incendiary Shield
to further annoy you. Combine that with harpy evading, we have a tough battle
ahead. Especially if you rely on your buffs to actually hit anything, like me.
Picture:
Location:
Desert. Refer
to the map for the location, as it cannot be explained.
See Boss Map for Location on
World Map
Rating: 7. If
you rely heavily on your buffs, Harpy Queen might prove to be an annoyance. Her
decent hits and good evade make her a foe you want to prepare well for.
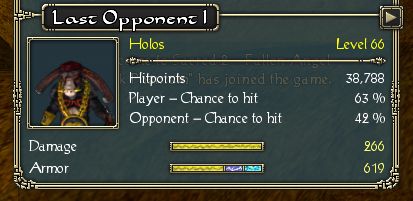
Holos
Preferred
resist to use: anything except magic and ice.
Preferred
resist to protect yourself from: melee.
Holos is a
minotaur mini boss found in the desert. I regret saying this, but considering
how tough minotaurs were in S1, Holos lacks. He has only two tricks, he can slow
just like the harpies can and he can stun. Which he does. A lot. The stun is
the only thing that protects him from utter destruction, since his normal attack
is really not impressive.
Picture:
Location:
Desert, head
out from El Darrag towards the east. Find a way to cross the ravine and then
head north. When you reach the mountain, find a path on the west side. Enter the
cave, he is inside.
See Boss Map for Location on
World Map
Rating: 6. His
unimpressive attack is a shame on him, as he could be so much more. His stun is
the most dangerous trick he has and that speaks badly about him. Too bad, I
would have loved a good fight with a minotaur.
Daloriel the Depraved
Preferred
resist to use: fire or poison.
Preferred
resist to protect yourself from: magic.
Not really sure
what to say here. Daloriel is a human t-mutant who uses no skills and is hard to
hit. He boasts average hitpoints and weak damage. The problem are the two mages
that accompany him, Handarir and Bergenthar. I assume they are twins of some
sort. They are like champions, not that tough to kill. They both use magic
lightning bolts that can stun and Bergenthar has a powerful heal skill. Finish
off Bergenthar first, then kill Handarir. Finally, defeat Daloriel.
Picture:

Location:
In the t-mutant
area above the desert. Head up north until you see on the map that you are next to
the last great t-energy lake. The cave Daloriel and co. resides in lies on the
south east side of this lake.
See Boss Map for Location on
World Map
Rating: 6.5. In
no way dangerous, but the heal from Bergenthar can surprise the unsuspecting
adventurer.
Main
Bosses
Main bosses are
those big guys the campaign quest points us to. They are favorite farm objects,
but some can be very strong. Generally, they have high hitpoints and can hit
hard.
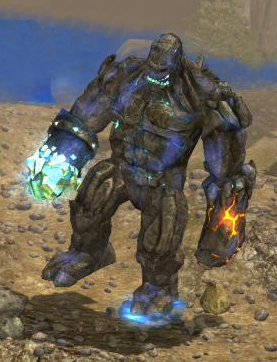
Gar’Colossus
Preferred
resist to use: anything really, but avoid magic.
Preferred
resist to protect yourself from: magic.
The first real
boss many will meet. In this role, he is not hard, but still has some nasty
things you need to watch out for. For one, he will have a shield up when you
begin this fight. This shield can be breached, but it takes time. It is better
to start running around and wait until he throws a single rock. Destroy this
rock, then attack him. You will notice the shield falls far easier.
Colossus has a
few different types of attacks. He can normally attack when you are melee
attacking him. This attack hits hard and is surprisingly fast, so if you melee
him keep your finger on the spacebar. In the ranged department, he has two
attacks. He can sudden bow forward. This attack will always hit once and if the
flying rock he releases hits you, twice. The first attack is always a hit and
will push you back a bit. Fortunately, it does not do that much damage. With this
attack he also releases a flying rock towards you. Avoid it if at all possible,
it hurts. His second ranged move is a rockfall on you. He slams his crystal fist
into the ground and causes rocks to come down. This is his most damaging move,
but also the easiest to dodge. Just move out of the way. This attack also
regenerates some of his shield.
Picture:
Location:
This guy is
just outside of Orcish Byway, the town where you start the Unique Mount quest.
Take the portal of Wargfells and just follow the road north. He is pictured on
the map, so it is hard to miss him.
See Boss Map for Location on
World Map
Rating: 7.5.
For a main boss, he is an easy one. His most deadly attack is easily avoidable
and the others are, compared to his colleagues, not that deadly. You should still
be careful though, if he starts doing his rockfall attack often his shield will
be back to full strength in no time.
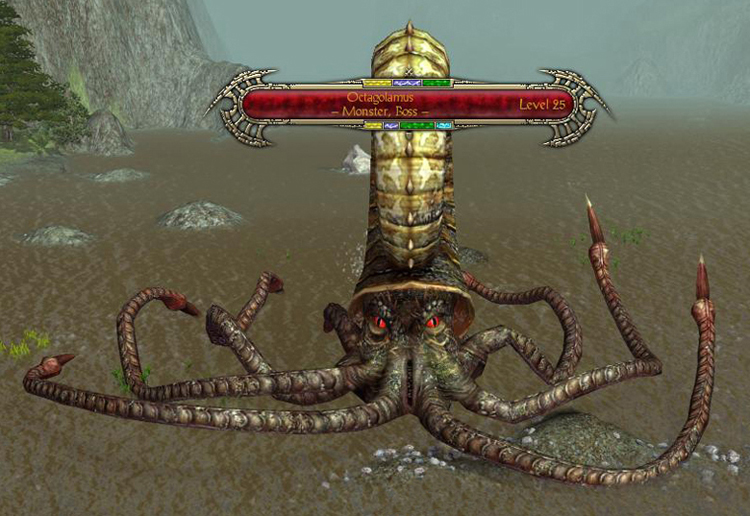
Octagolamus
Preferred
resist to use: his only weak spot is fire.
Preferred
resist to protect yourself from: poison or magic, I prefer magic.
The second boss
most run into, Octagolamus is an octopus like thing that remains deep in the orc
lands. For the ones who expect another fight like Colossus, think again. Octo
hits quite hard and is a very powerful and long ranged melee fighter. His
normal attack are swipes from his tentacles. Those swipes are pretty long ranged
and can be quite powerful. His two other melee attacks are a charged attack and
a magic attack. The charged attack is extremely powerful, but easy to dodge.
You’ll see his tentacles lighting up and preparing to strike. Move when he does
that, he cannot hit you when you move. His magic attack is an area of effect
attack and is harder
to evade. This is why I prefer a high magic resistance when fighting Octo. He
also has a short ranged ranged attack, where he spews something. You do not take
much damage from that, but it will vine you so he can close in on you.
Picture:
Location:
Head north out
of Za’Zurik. Follow the mountain ridge until you find a road heading into the
mountains. Take this road and head straight past the resurrection monolith. Enter
the cave, go through it and head through the door on the left. Then just exit
the cave and you are there.
See Boss Map for Location on
World Map
Rating: 8-8.5.
His attacks are strong and he has a hefty dose of hitpoints. Fortunately, he
cannot attack ranged fighters well.
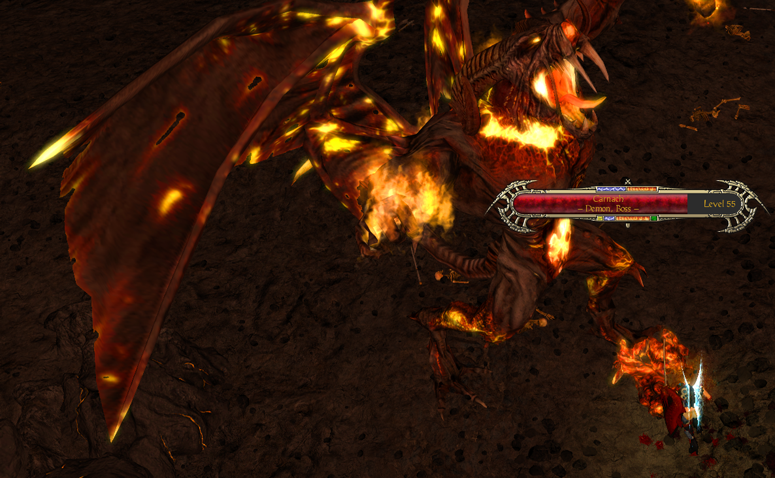
Carnach
Preferred
resist to use: ice.
Preferred
resist to protect yourself from: fire.
The Balrog of
S2, Carnach is the boss found inside the Seraphim Caverns. Carnach is another
step up from Octo in that this guy can summon and has some powerful ranged fire
attacks. His normal attack is fast and does moderate damage. He can summon fire
traps (different ones than the Temple Guardian's inside the machine use), these fire traps
create fire summons for him to attack you. He has a teleport spell that didn’t
bug on me for once (could be fixed in the new patch) and he has a strong fire…
crack spell. He calls up small streams of fire in the ground. Carnach boasts
some good defenses and a hefty dose of hitpoints. Definitely not to be
underestimated.
Picture:
Location:
At the end of
Seraphim Caverns. The portal of the human hideout is closest to it.
See Boss Map for Location on
World Map
Rating: 8.5. A
powerful fire boss with summoning and ranged area of effect attacks that really hurt. Best
battled with ice, the only resist he cannot handle.
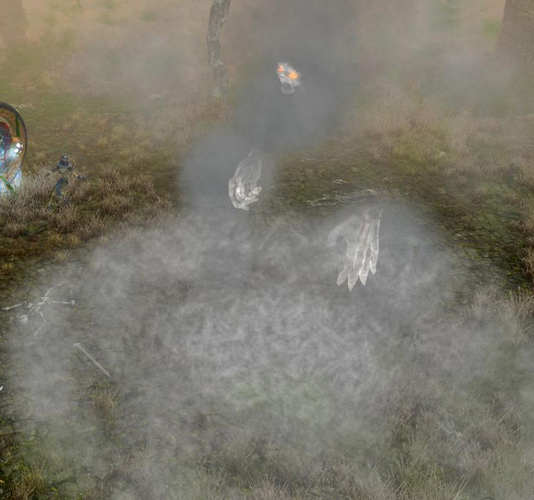
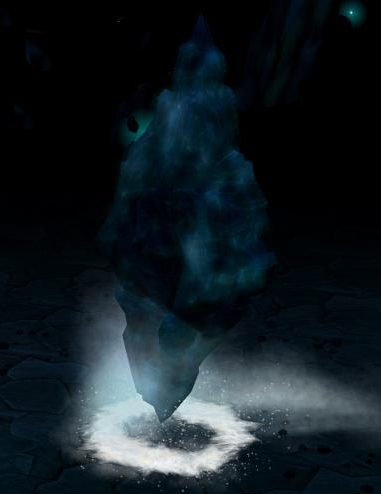
Swirling Mist of Miasma
Preferred
resist to use: fire.
Preferred
resist to protect yourself from: ice and poison, but focus on ice.
Hmpf, if you
are like me and hate the swamps, then this will be a new frustration. Mist dude
is freaking annoying because you cannot directly attack him, but he can attack
you! He bullets you with ice attacks, fortunately not too much, but still. You
kill this guy by killing his summons. Every time the last one falls, you will
see ‘addition damage xxxx’ meaning he received damage. His summons are ghouls
(poison attackers) and liches (ice attackers). I favor ice relics in this fight,
as Mist dude does the most damage. The fight is relative easy, but with a lot of
people on a server (5+) it can take a long time.
Picture:
Location:
Take the portal
of Hissil’Ta and head to the south west resurrection monolith. Follow the path onto
the platform and look around a little.
See Boss Map for Location on
World Map
Rating: 7.
Easiest boss in my opinion, but also one of the more frustrating ones.
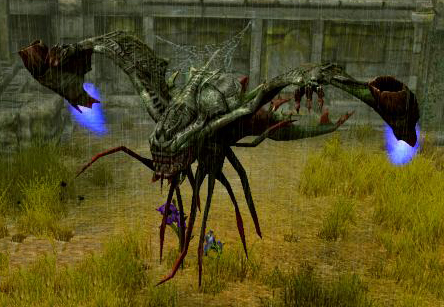
Garganthropod
Preferred
resist to use: fire.
Preferred
resist to protect yourself from: poison.
Welcome to the
stage of death. Many a hardcore player has lost one or more toons at
Garganthropod, king of the scorpions and lord of damage per second. This guy is the strongest
boss until now and until the last boss. His normal attack is blows from his
scissors. These are very fast and pretty strong. He can easily beat you with these
alone. But no, it gets worse. His ranged attack consists of smashing his
tail into the floor. The tip of the tail comes up near you and strikes you for
bad, albeit not as hard his as normal attack, damage. Was this it? No. He can
summon two!!!!!! T-mutant scorpions to his side. These alone can be deadly, his
presence is unnecessary. And to freak you out even more, Garganthropod boasts a
short duration aura which increases his attack as you damage him. More damage on
him = more damage that he does with this purple aura. There is no easy way to
fight this battle. Stock up on health potions if you must fight him or If you
have a death wish. My tactic: run a lot, have a hand on your space bar
constantly and do not attack him when he has a purple aura. Try to separate him from his
mini scorpions and beat them first. Never ever get under attack from both Garganthropod and a summoned scorpion, that will be your certain demise.
Picture:

Location:
Follow the road
south out of Khorum. Take the third path to the east. Follow this path to the
end. Then coordinate on the map towards the resurrection monolith. The rest points
itself.
See Boss Map for Location on
World Map
Rating: 9.5.
Toughest, meanest and deadliest boss until now. I would advise you to avoid him,
it is just too risky.
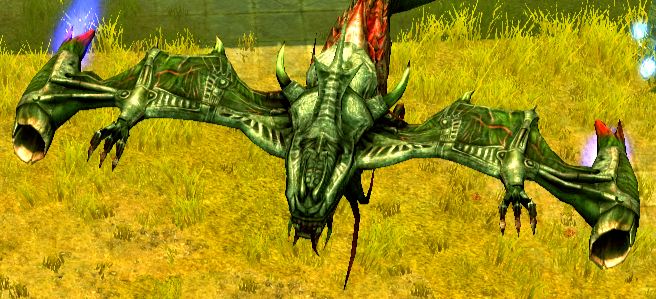
Kral of the Winged Daemons
Preferred
resist to use: fire or poison. Don’t let his resist scare you.
Preferred
resist to protect yourself from: magic or fire, but I strongly recommend fire.
Kral is the big
form of the flying demons you will find around his place. Kral is a machine and
can thus be healed by the 4 electric like pillars standing in the corners.
Objective one: eliminate those. After they are gone, Kral loses his heal or
power up ability. It does not make him easier though. He sort of has two modes:
ranged and melee, of which melee is the real problem. In his ranged mode, he
uses three attacks. A sort of scream attack which seems unavoidable and does bad
damage. Heal after it. A charged blue fire ball attack. I am guessing these do
fire damage, but I was not eager to find out. This attack can be easily avoided,
but make sure you are a distance away from the impact location of these balls,
since they are an area of effect attack. His third ranged attack is the famous eye laser attack. Kral
shoots fast laser beams from his eyes for some bad damage. This attack is magical
based and magic relics work wonders here. In melee form, Kral is bad news. He
stops flying and will start pursuing you. Now, do not be fooled! One second it
is as if his attacks aren’t doing damage, and the next second half of your hitpoints
are
gone. His attacks are hard to see, but they are fast, irregular and strong. Keep
healing, or find a way to bullet him from a distance.
Picture:
Location:
Head out from
Na Fian. Take the first path south and follow that one. Once you find the ruins,
just keep heading straight away.
See Boss Map for Location on
World Map
Rating: 9.
Ranged attacks are bad, melee worse. I suspect different builds will vary greatly
with Kral, but I think this rating is accurate enough to describe his power and
abilities.
Facetteleon
Preferred
resist to use: bugger can resist all of them, but fire works probably best.
Preferred
resist to protect yourself from: magic and ice.
Crystal boss is
the boss of Dryad Island. He is difficult for me to describe, because of his
shape I cannot see too well what he does. Fortunately, he is not that powerful,
but he has a few annoying bits and bites. For one, practically all of his
attacks have stun. So, you are going to be stunned for a bit. His melee attack
is very fast, but does not do much damage. His ranged attack consists of a
single, undodgable lightning strike, with stun of course. This is also his most
damaging move, which means nothing. He also has some sort of heal attack where
he fires several bolts of light to the sides and heals. This healing is very
little though. The only thing this boss has to boast is his high defense, so it
can take a bit of time before he falls.
Picture:
Location:
Take the portal
of Dyr-Laigh. Follow the road west, until you reach the split in the road. Just
follow the main path until the trader. There, head up the hill, into the cave.
Crystal boss awaits you there.
See Boss Map for Location on
World Map
Rating: 7.5. Doable for a boss, might take some time cutting through his armor though.
Optional Bosses
Optional bosses
are bosses that are at the end of certain side quests. These are quite varied in
terms of power.
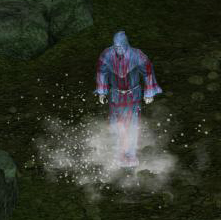
Evocator
Preferred
resist to use: pick any.
Preferred
resist to protect yourself from: magic and ice, focus on magic.
If you want to
reach this guy, you have to start the quest chain ‘The Ghost Village’, starting
in Antamark's Gate. It is a small quest chain and you close it with this guy.
Anyway, Evocator. He’s a weird boss. In terms of power, he is a ghost mage with
more hitpoints, though that counts for nothing. He has a normal melee attack, a
lightning bolt and some sort of ice buff of which I have no idea what it does.
This guy is pretty easy.
Picture:
Location:
Follow ‘The
Ghost Village’ quest chain, you eventually will find him.
See Boss Map for Location on
World Map
Rating: 5. Very
easy ghost mage with more hitpoints.
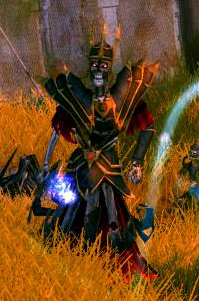
Terus, General of the Undead Legion
Preferred
resist to use: poison, I’ll explain later.
Preferred resist to protect
yourself from: magic.
At the end of
the loooooong 'Undead Legion' quest awaits Terus, General of the Undead Legion.
This guy is lots of fun. He’s not alone though, he starts out with two
centurions and mages to back him. These are easily dispatched, if you choose to
do so. I recommend to, since Terus can summon two tribunes and one mage at a
time. With all those together, you might have a hard time. Terus will summon
pretty soon in the battle and afterwards when his summons are killed he will
summon more. Terus can
also teleport and has the uncanny ability of death refusal. You’ll have to slug
it out against him three times before he dies and stays dead. Now, you might
think "Poison? Did you get a blow against your head or something?! He’s
protected against that". Well, yes he is protected, but his tribunes cast a
resistance shield against fire. This shield gives more fire protection than he
has poison protection.
Picture:
Location:
Follow the
'Undead Legion' quest chain. You’ll find him at the end of the chain.
See Boss Map for Location on
World Map
Rating: 7. Lots
of summoning and a refusal to die at once. Fun boss though.
---------------------------------------------------------------------------------------------------------------------------------------------------
Credits:
Clan DA for commenting and helping me improve the guide.
DarkWolfNine for the stats screenshots of the mini bosses